Here's just a teaser of 3 pics from Michael Montemarano and Rich Hasenaeur's epic Camerone game at Historicon in Fredericksburg, VA this past weekend:


If all goes well I will have a lot more pics from the 3 games played on this impressive set-up during the convention, one of which resulted in a Mexican Republican victory, one of which resulted in a Legion victory (how I'm not exactly sure, but I think it had to do with the Mexican players being overly cautious and not attaining any of their objectives inside the Hacienda compound within the limited amount of time/number of turns available), and one of which apparently resulted in a nailbiting finish that could've gone either way.
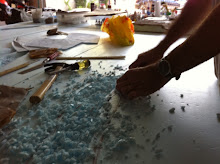
Meanwhile, here are some pics of Michael's Hacienda de la Trinidad compound being used to playtest the rules and scenario in the run up to Historicon...


Finally, for those who may be interested, here are some WIP pics of Michael's compound being built, followed by his own in-depth TUTORIAL on how he did it...


As always happens, there were significant changes during the construction process, wrought by "better" ideas that popped up as work progressed, along with experiential input, also known as hard-earned lessons.
The dimensions are 28" square. The two buildings (2-story hacienda and 1-story barn) are 20" and 8" long, 4" wide, for the structures, with about a 1⁄2" overhang all the way around for the base on which each building sits. This base size parallels that of the bases of the walls (which makes them stand up). Of course, the bases of the walls are bigger/wider in places for the sheds. This works out to a ground scale of about 1" = 2m. The walls therefore are a touch too tall, coming in at around 14 scale feet tall, but they look good this way.
The research material I have uncovered does not address -- with any specificity -- the condition of the western part of the buildings. So we are clear, it is here that Danjou posted himself at the beginning of the defense. This usually is referenced as a “ground floor room at the NW corner” of the complex. Indeed, there's a fair amount of contradiction in the sources. Only one source, James Ryan's book on Camerone, discusses that the western part was indeed two stories, like the hacienda clearly was, as he discusses the Mexican attempt to break into this room from the hacienda (successful, eventually) and from above (not successful). That being said, read carefully Ryan clearly takes a fair amount of license in his narrative, being too interested in colorful prose and less interested in historical accuracy, or so it appears to me. So you understand my frame of reference, I am an amateur historian by avocation (my undergrad degree before law school), and a trial lawyer by trade, so for me the concept of "evidence" tends to be pretty narrowly drawn. When Ryan discusses the thought processes of some of the actors in this drama, and there is no historical record of what they thought (e.g., a memoir), or any footnotes, I tend to treat his account with a fair measure of circumspection.
This “room” is described variously as not having a door except into the corral, or a door into the corral and into the street (outside the complex), and not having windows. Nor is there mention of a staircase in this room. Certainly there is no access into the hacienda proper. And since there’s no ground floor access, how would there be access on the second floor into the building? Sure, I will concede that a barn could have hacienda access to its second floor, but no access from within the barn to that same second floor, but that doesn’t make much sense, to me at least, and overall this starts to sound like a regular barn, does it not?
If there is a single source which I relied upon most, it is Colin Rickards’ book. Rickards does not mention a second story or breaking in from above, but is clear on the access from the corral coupled with none from the hacienda. He does suggest access from the street. So, being left with a basis for an educated guess, but no means by which to resolve this conundrum, I decided that I would do a single-story barn attached to the 2- story hacienda.
I did separate buildings for a couple of simple practical reasons. First, storage and transport. Yes, it will be freestanding pieces on a ground cloth (more photos to follow). Even at only 20-1/2 to 21" long including the base ovelap, the hacienda is difficult to store. I found a bin just last night which will squeeze it in lengthwise, and I have a total of 5 pieces which are 20" long (E & S walls, 3 hacienda pieces- more on that later). Despite the internal bracing and tons of glue (more on that later), this thing is, at the end of the day, more fragile than not. Plus I intend to move it to conventions, so this is a significant consideration. Second, if I end up being wrong about the barn (I would suggest my discussion above is a careful and well-reasoned argument, but which does not make it right), I always could build a new 2-story 8” long building to accommodate the new information. Win, win.
The walls are indeed scratch built. The resin walls I intended to use came with a few drawbacks. First, weight, as they would be heavy to store and move (and for heaven’s sake don’t drop them). And the weight would serve to bend the lightweight styrene I used for the basing, since the sheds need to attach to something, bases are required – the wider bases you see are for sheds. I feared bending would damage the handbuilt sheds, which will be fragile. I also would need to secure the wall sections to each other at the ends to make the 20" long E and S wall sections (at the stable and along the E side of the corral between corner and hacienda). And I would need to cut one to fashion the breach at the SE corner. Then, there’s the question of duplicating their look on the surface of the hacienda and barn (more on that later). By contrast, if I scratchbuild, they all will look the same, will be lightweight, etc.
Of course, I figured out that this was the way to go only after I had started putting the buttresses on the walls of the hacienda, to match the buttresses on the resin walls. I decided, therefore, that the buttresses would be on the buildings only, as I liked the look they give, and I could rationalize putting them there (load-bearing walls for 2 stories and roof, etc.). And, to be honest, they were too much work to do for another 6 feet of walls or to remove from the hacienda (though they might have been OK relative to the surfacing when removed). The gateposts are 1/4" dowel.
Ah, surfacing. My favorite subject. I cannot paint figures to save my life, as much as anything else due to a lack of practice over the years. I can, however, paint the random inanimate object with my eyes closed. Vehicles? Structures? No problemo. And, I have learned, a well-done structure with surface detail almost “paints itself” – indeed, a badly-made structure is hard to get right. The basic building material is rigid black foamcore board called gatorboard. I understand this is a material familiar and common to professional artists. I have an artist friend who gave me some, and it is a gift from the gods for this kind of project. I use Quick Grab glue, which is messy but both fast and strong. The surfacing was accomplished the following steps.
Cut out holes in the surface and fill with small pieces of commercial adhesive-backed sheet stonework or brickwork, available from a railroad shop, to do the stone showing through the stucco surface.
Dent, crack, groove the surface of the gatorboard with a blunt object (the butt end of my Xacto, the end of a big file). Wreck the top edge of the walls with a file – I use 12" half round and rat tail files – to give the deteriorated and damaged look.
Paint with acrylic Drylok paint leftover from finishing my basement (I save too many things). This is very thick, with sand in it, and both seals the gatorboard (spray paint melts the foam interior) and provides some surface detail, removes the flatness of the gatorboard, and fills defects, etc., as you see fit. Use coats of varying thicknesses. Apply with the end of the brush to stipple, for it you brush it on, you will leave bristle marks. (Some of these are ok, though.)
Randomly apply, in varying thicknesses, wood filler. I use Elmer’s, which is water soluble, and put it on with my fingers and a 1⁄2“ trowel for the nooks and crannies I want to fill (the edges of the commercial brick sheeting). This then gets sanded gently with like 100 grit sandpaper, again to varying degrees, giving you smooth in some places and not so smooth in others. This also gives a different surface for the paint, which makes it look different, too.
Prime with spray paint. I think the flat light grey I used will work best, since it is dark enough to shade the deep crevices, and the “realistic” westerns I use as research material (The Wild Bunch, The Professionals) show stucco with a grayed-out cast to it, and not the warm cream-yellow-tan that most wargamers like to use. This is Mexico, not Italy. I had considered flat dark brown, but this was too dark. I also found that some light grey is much too bluish.
The final effect is an easily-painted surface, which will take about 4 coats of drybrushing, beginning with a dull medium to light brown, followed by dull tan and then a very light tan, finished with dull off white. The stonework showing through should be painted by brush, not drybrush, using dark brown and dark and medium grays.


The bases will be a warmer and yellower light brown, to match my groundcloth. The joint of the walls and bases, for the outerwalls as well as buildings, is filled with wood glue (yellow Elmer’s) and sand, which gives texture and fills the crack there.
The stables on the S wall are gatorboard sides (perpendicular to the walls), with commercial plastic brickwork cut to size for the fronts. The brick also got deteriorated with Dremel, file and sandpaper. The poles are flexible plastic tubing (think Windex bottle) with very thin (1/8"?) dowel inserted. This makes the tubing rigid, and permits you to damage the surface to make it look like wood. The walls of the sheds are coffee stirrer in various widths as boards, glued onto heavy cardboard (for strength, the hell with looks), along with more plastic brickwork. You see the brick but nothing else in the photos; I have built the sheds onto the bases since the photos were taken over the weekend. The chimney is the same commercial brickwork.
The roofs will be either tile (buildings) or thatch (stables/sheds). The tile will be strips, perhaps 3/4" wide, of corrugated packing material, layered from the bottom of the roof (at the gutters) up to the ridgepole, to form the tiles. This material will be glued onto sheet styrene. To make the sags and holes in the roof, I needed something which would bend and hold its shape. I am using hardware cloth, which is 1⁄2" metal mesh in a square pattern, easily cut with pliers. This will be glued onto the styrene, and will permit sags to underlie the tile or thatch. The thatch will be scavenged from an old corn broom. I will send photos of all this.
I think I will use a grey-brown wash on the yellow corn broom to give the aged and rotten color of the thatch, remembering that in the new world the thatch is lighter than in Europe. The tile will be no issue. I have painted a few dozen Italian 15mm buildings in the past few years, and have lots of source material on terracotta colors, which are almost never flowerpot rust-red-brown (except as a primer/basecoat).
The roofs will be glued down. What you do not see in the photos is the complete interiors I built for both floors of the hacienda and the barn, to permit them to be played. I did not want to remove roofs (which would mean they never quite fit right when they are on), plus how do you then play the first floor of the hacienda? If building one interior floor, why not three? And, with secured roofs, the buildings can have the internal bracing you see, which would impede play but makes them sturdy.
The buildings and interiors have the same windows and doors, with a staircase between the first and second floor of the hacienda. The first floor has a removable wall at the barn end, so the players can try to break through it.

Thanks again to Michael Montemarano for allowing me to post the details of his rather epic scale, painstakingly accurate miniature fabrication of "La Hacienda de la Trinidad" -- well done, sir!
My own version has been on the boards for almost a year now. But I only drew up the plans, then handed it off to a professional for the actual miniature construction. That process recently amped up, and as it proceeds in the coming months, I will report on any and all progress here.
The plan is to have the entire battlefield ready in time for the upcoming 150th ANNIVERSARY of the battle of Camerone, this coming April 30, 2013.
I also hope to have the 3rd Company of the 1st Foreign Regiment (The Company Danjou) painted, based, and terrained, using the soon-to-be-available 28mm Maximillian Adventure French Legionnaires coming from GRINGO 40, the small company founded by Ged Cronin in the UK to produce 40mm and 28mm figures for an ever-increasing number of 19th Century Mexican campaigns, stretching from the Alamo all the way to the early 20th Century Mexican Revolution, featuring Pancho Villa himself.
If you are into wargaming any such Mexican campaign, but are not yet familiar with Ged's figures, I humbly recommend you check them out here:

(Click image above for LINK to Gringo 40's)